Email Setup - Outlook 2016 / 2019

Updated Thursday, October 21, 2021

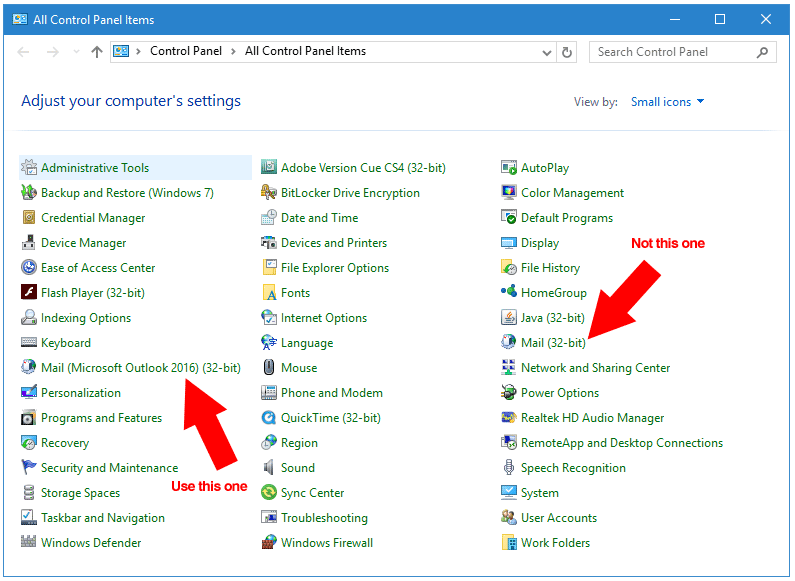
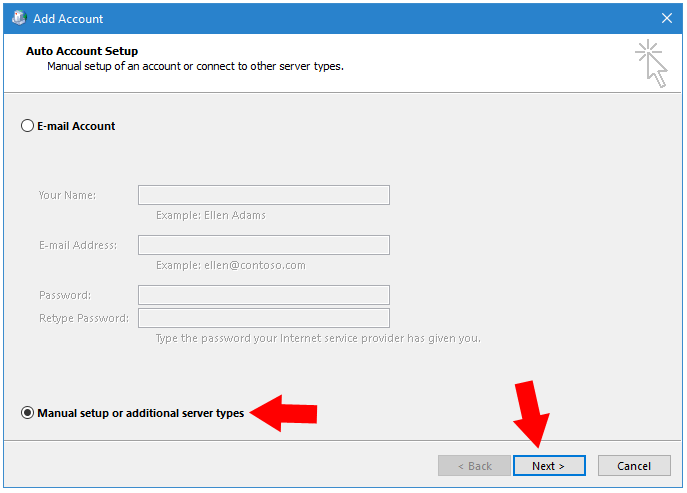
 Step 1 - Skip this step if you are editing an existing Outlook account.

  1. Navigate to Windows Control Panel.
  2. Click Mail (Outlook 2016) (32 Bit)Mail (Outlook 2019) (32 Bit), or Mail (Microsoft Outlook)(32 Bit) depending on your Outlook version. 

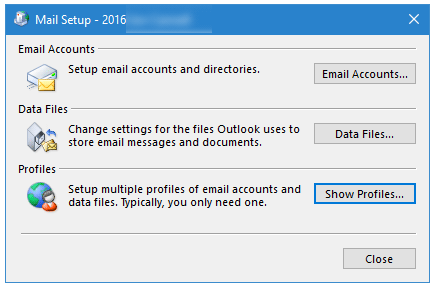
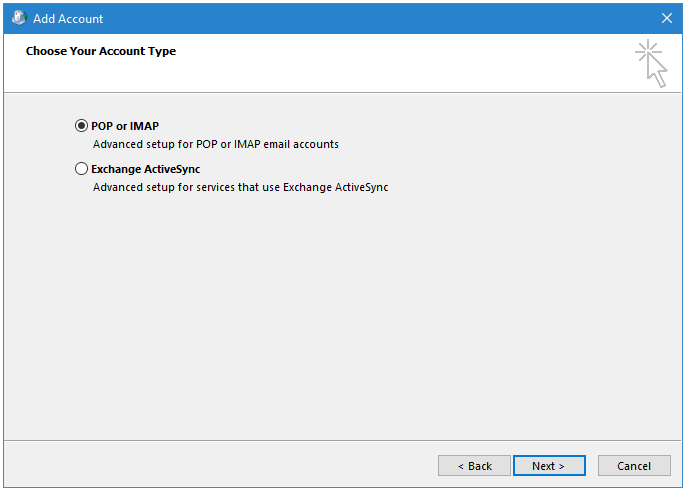
Step 2 - Skip this step if you are editing an existing Outlook account.

  1. Click Show Profiles in the Mail Setup box that is displayed.
  2. Enter a your name when prompted, and click OK.

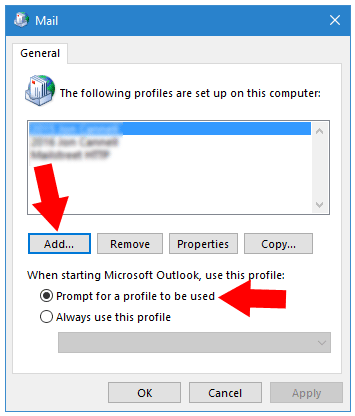
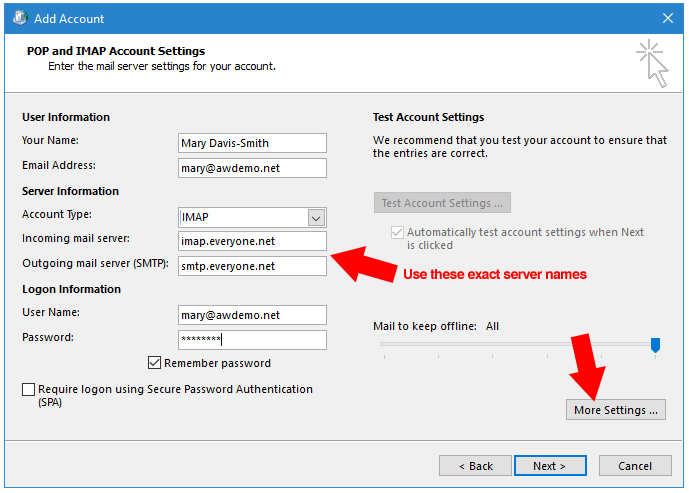
Step 3 - Skip this step if you are editing an existing Outlook account.

  1. Click Add in the Mail box that is displayed.
  2. Select Prompt for a profile to be used.
  3. Click OK.

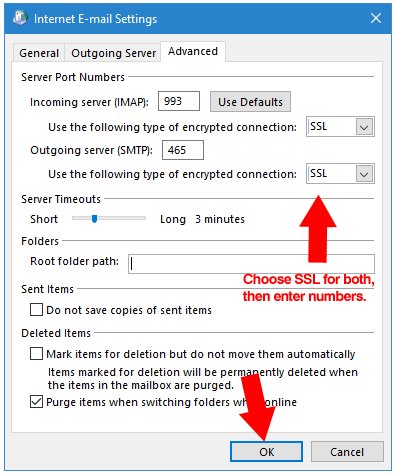
Step 4 - Skip this step if you are adding a new Outlook account.

  1. Launch Outlook 2016.
  2. Click the File menu, then select Info.
  3. Click Account Settings.
  4. Click the Account Settings dropdown item.

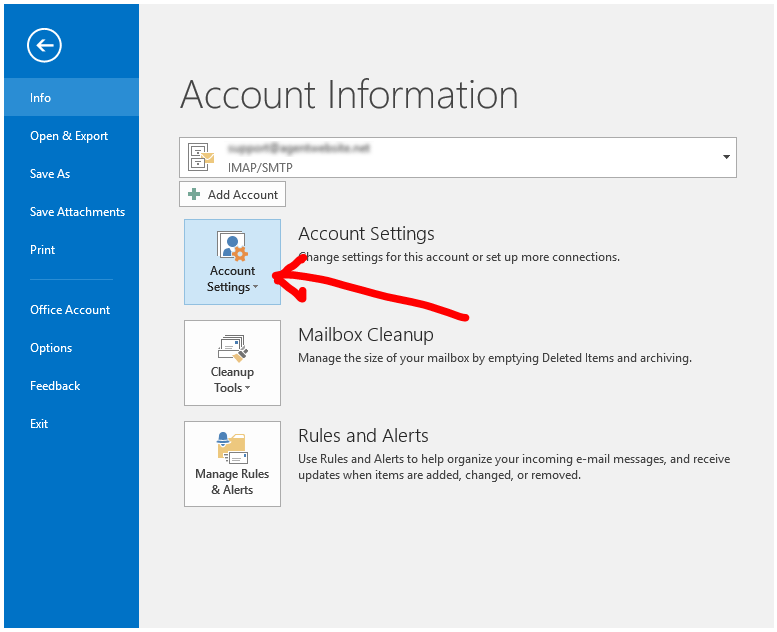
Step 5 - Skip this step if you are adding a new Outlook account.

  1. Double click the account in the Name column that you wish to edit.

Step 6 - Skip this step if you are editing an existing Outlook account.

  1. Select Manually setup or additional server types.
  2. Click Next.

Step 7 - Skip this step if you are editing an existing Outlook account.

  1. Select the POP or IMAP option.
  2. Click Next.

Step 8

  1. Type your full name in the Your Name box.
  2. Type your email address in the E-mail Address box.
  3. Select IMAP from the Account Type menu.
  4. Type imap.everyone.net in the Incoming mail server box.
  5. Type smtp.everyone.net in the Outgoing mail server (SMTP) box.
  6. Type your complete email address in the User Name box.
  7. Type your password in the Password box. (Do not copy and paste your password.)
  8. Check Remember password.
  9. Click More Settings.

Step 9

  1. Click the Outgoing Server tab.
  2. Check the My outgoing server (SMTP) Requires Authentication box.
  3. Make sure Use same setting as my incoming mail server is checked.

Step 10

  1. Click the Advanced tab.
  2. Set both "Use the following type..." menus to SSL.
  3. Make sure Incoming server (IMAP) is set to 993.
  4. Make sure Outgoing server (SMTP) is set to 465.
  5. Click OK. The dialog will close.

Step 11

  1. Click Next. The test dialog will be displayed.
  2. Wait while the tests run.
  3. Make sure the Tasks show a completed Status and a green checkmark.
  4. Click Close. The test dialog will close.

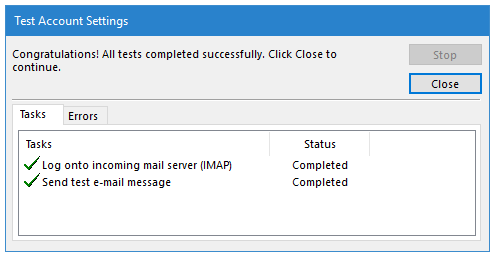
Step 11.1 - Only if prompted:

  1. Type your complete email address in the User Name box.
  2. Type your password in the Password box.
  3. If this is a private computer, check the Save this password in your password list box.
  4. Click OK.

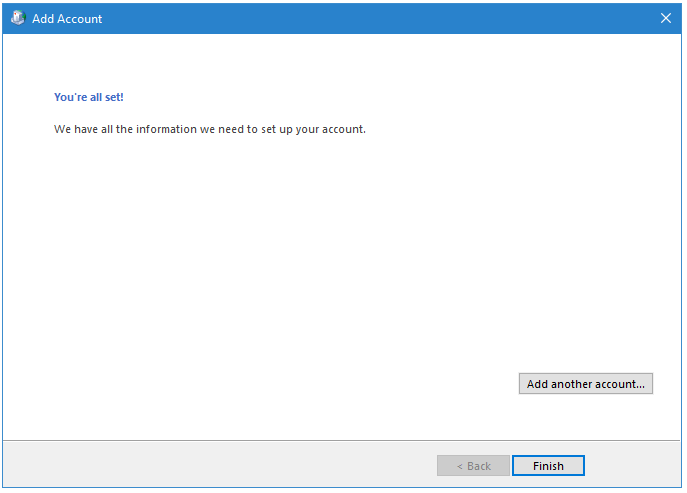
Step 12 - Click Finish.


Need Help With This? Contact Us!


20+ YEARS OF QUALITY SERVICE WITH A SMILE

@ 2024 AgentWebsite  Terms of Use | Privacy