Transfer a domain away from Point2 Agent

Updated Thursday, July 27, 2023

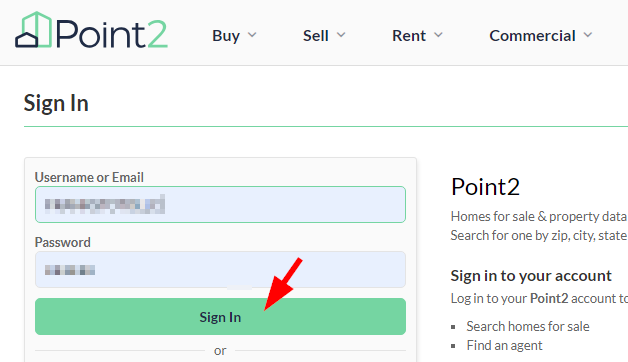
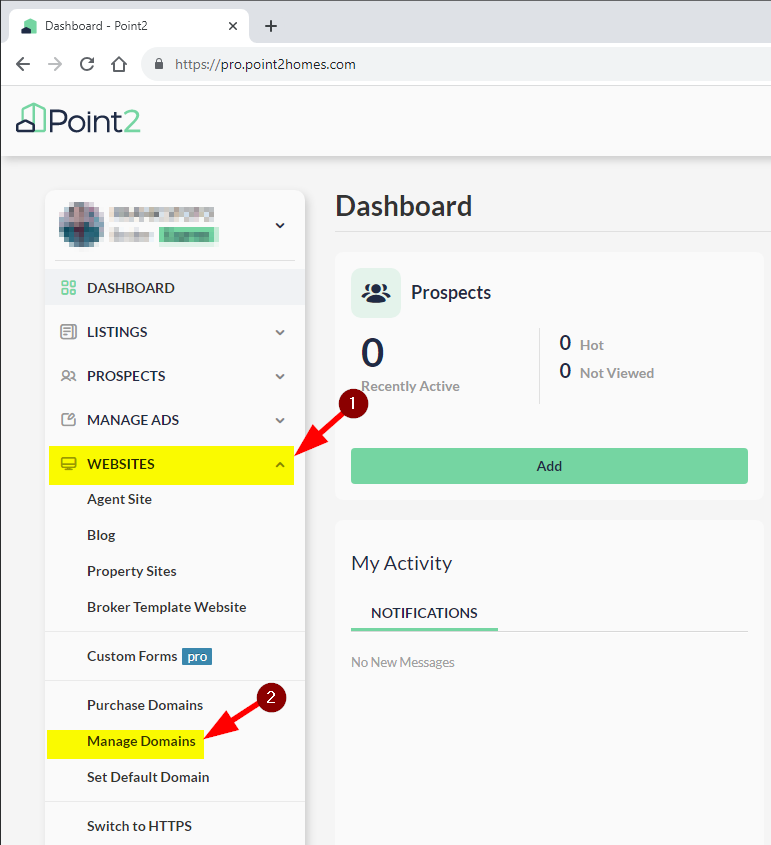
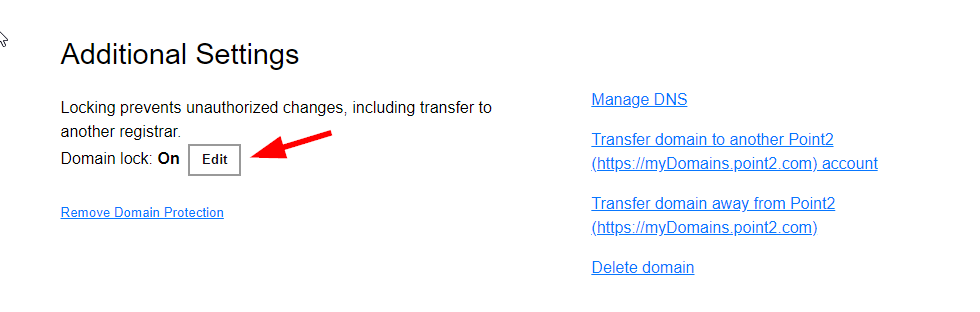
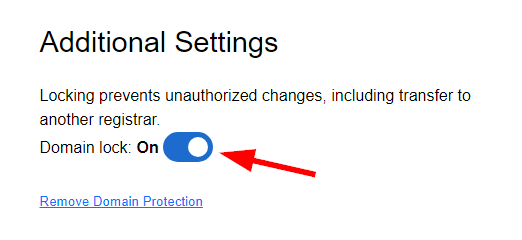
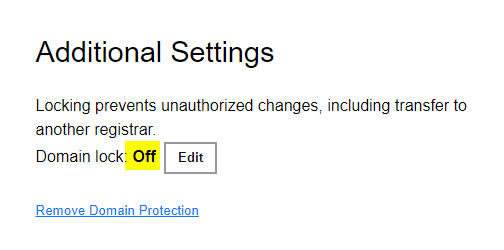
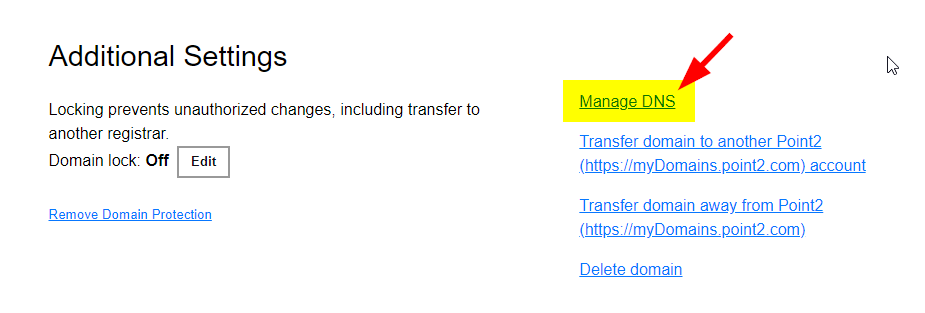
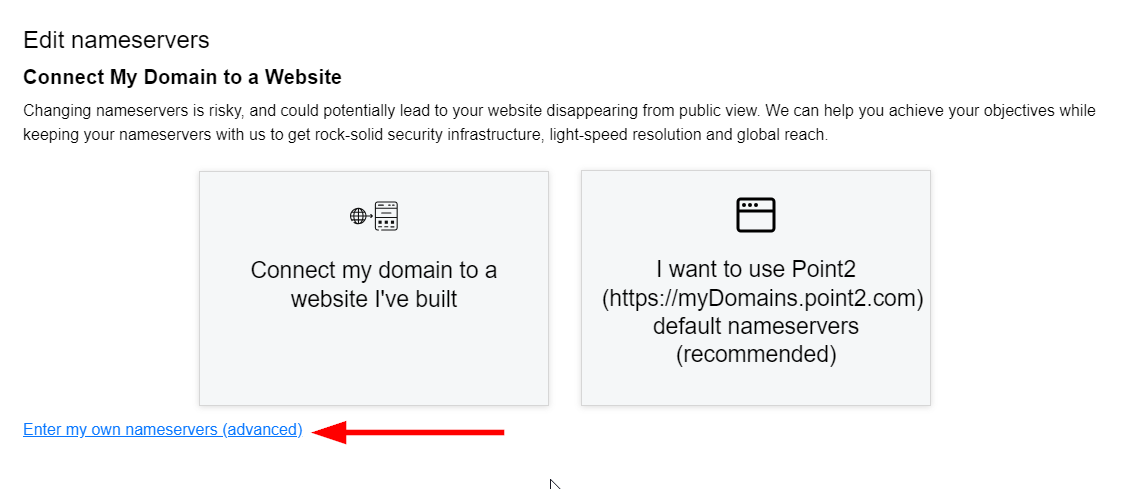
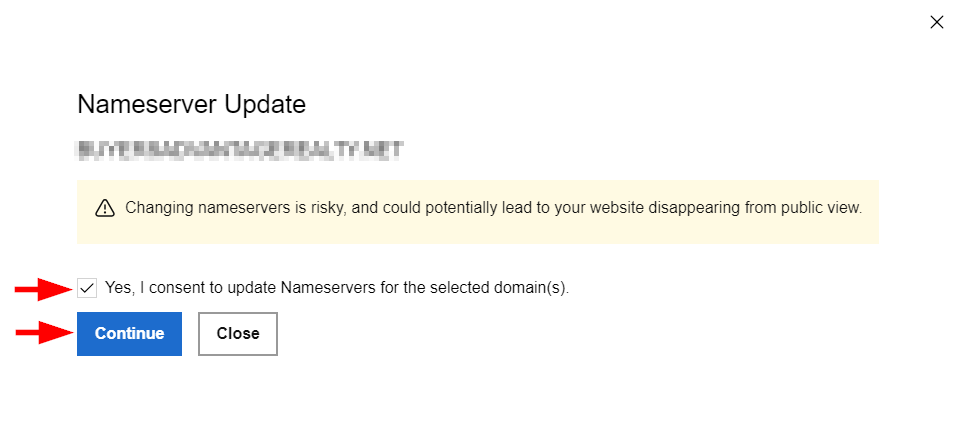
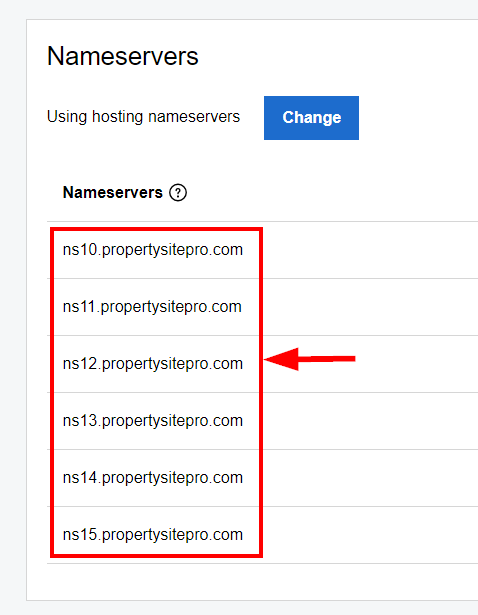
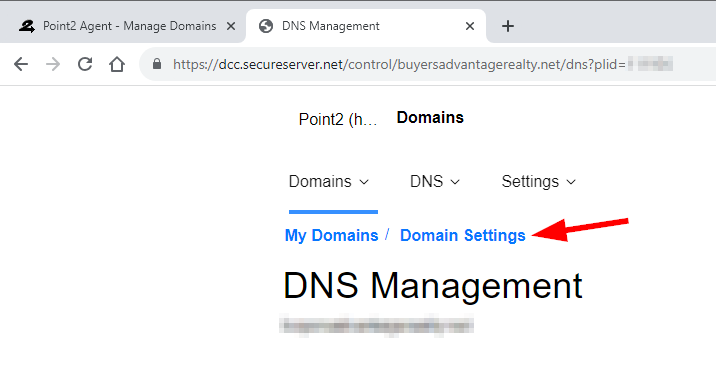
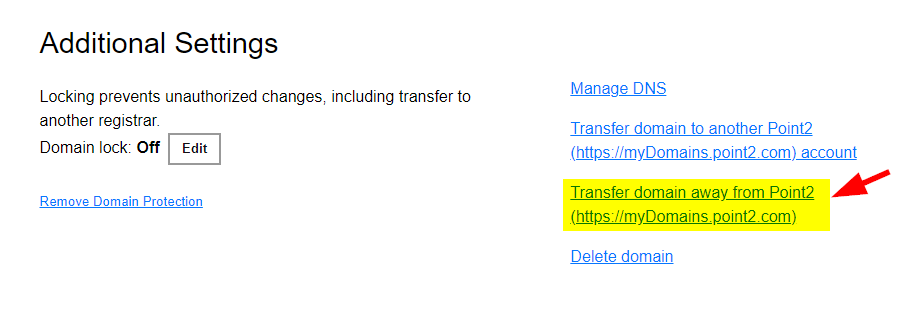
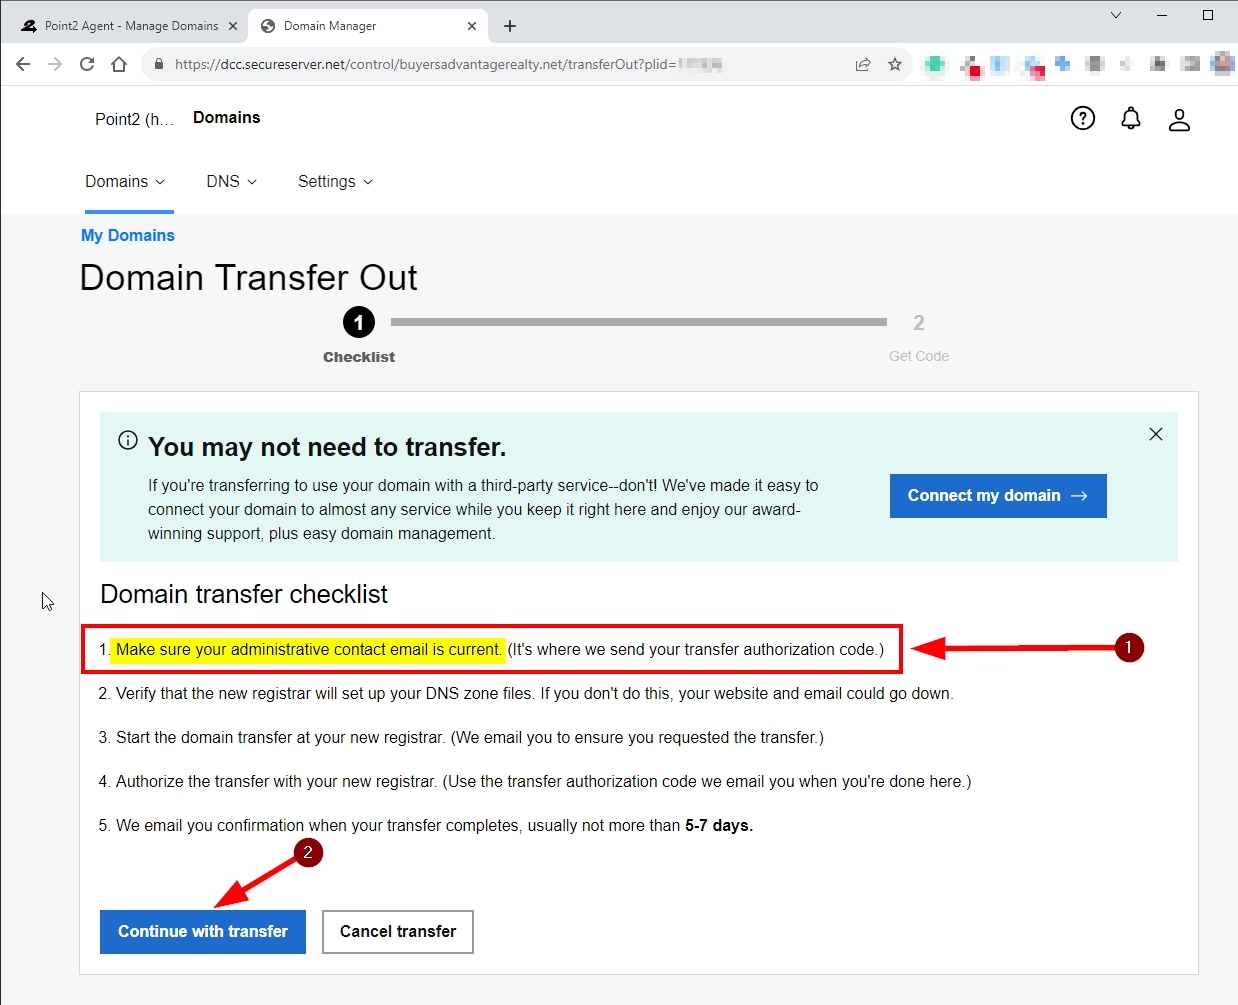
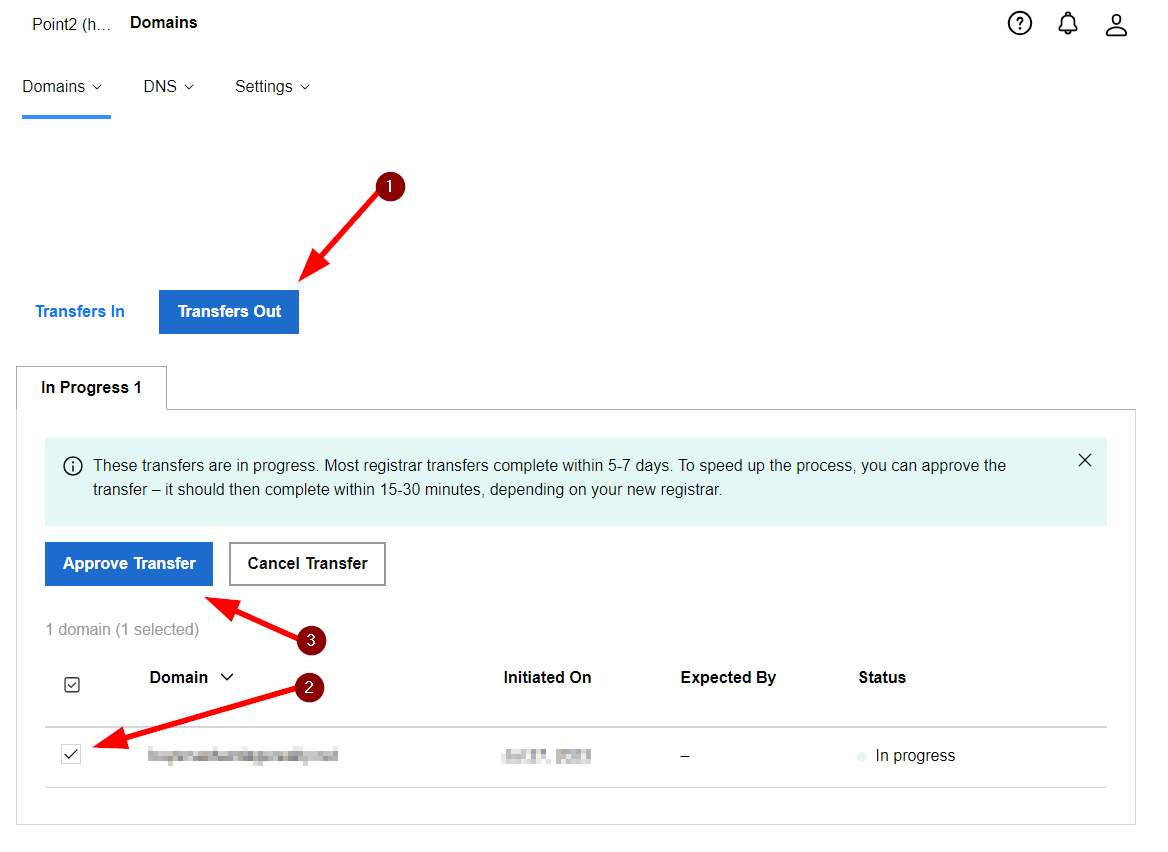
If you registered a domain through Point2 Agent, follow these instructions to gain control and transfer it to AgentWebsite. Contact AgentWebsite Support if you would like us to do this for you.

Instructions

  1. Log in to https://pro.point2homes.com/ with your Point2 login information. Contact Point2 support if you need help finding your username or logging in.
  2. Once logged in, click WEBSITES, then click Manage Domains.
  3. Find your domain on the Manage Domains page, then click Registrar Information.
  4. A popup window will be displayed.
    1. Make a note of your Customer # (write it down).
    2. Make a note of the Password (write it down).
    3. Make a note of the Email. If you do not have access to this email address, you must change it in step VI below.
    4. Make a note of the Phone.
    5. Click the GoDaddy account management panel link.
  5. Enter the Customer # and password you wrote down in the previous step.
  6. Click your domain. The Domain Settings page will be displayed.
    1. Note the Email addresses in the Registrant *and* Administrative sections.
    2. If you cannot get mail at the listed email addresses, click Edit and change them to ones you have access to.
  7. Scroll down to Additional Settings. If Domain lock is "On", click Edit.
  8. A switch will be displayed. If Domain lock is "On", click the switch once to turn it off.
  9. To unlock the domain for transfer, check the Yes box, then click Continue.
  10. A success notification will be displayed in the top right corner of the browser window.
  11. Additional Settings > Domain lock should now say "Off". Your domain is now unlocked and eligible to be transferred.
  12. To connect your domain to your new website before starting the transfer, click Manage DNS.
  13. In the Nameservers section, click Change.
  14. A popup will be displayed. Click Enter my own nameservers (advanced).
  15. Edit nameservers will be displayed.
    1. Click Add Nameserver four times.
    2. Enter the name servers listed below:

      ns10.propertysitepro.com
      ns11.propertysitepro.com
      ns12.propertysitepro.com
      ns13.propertysitepro.com
      ns14.propertysitepro.com
      ns15.propertysitepro.com
    3. Click Save.
  16. Check the Yes box, then click Continue.
  17. A success notification will be displayed in the top right of the browser window.
  18. The Nameservers section should now list the nameservers you entered.
  19. Click Domain Settings.
  20. Scroll down to Additional Settings, then click Transfer domain away...
  21. Domain Transfer Out will be displayed.
    1. Make sure the registrant and administrative email addresses that you checked in Step VI above are correct. If needed, go back now and change them.
    2. If the email addresses are correct, click Continue with transfer.
  22. Click Click here to see Authorization Code.
  23. Click Copy to Clipboard to copy the authorization code. Then paste it into a new email. It's also a good idea to save the code in a Notepad (Windows) or Text Edit (Mac) file. The code is case-sensitive.
  24. Email the authorization code to support
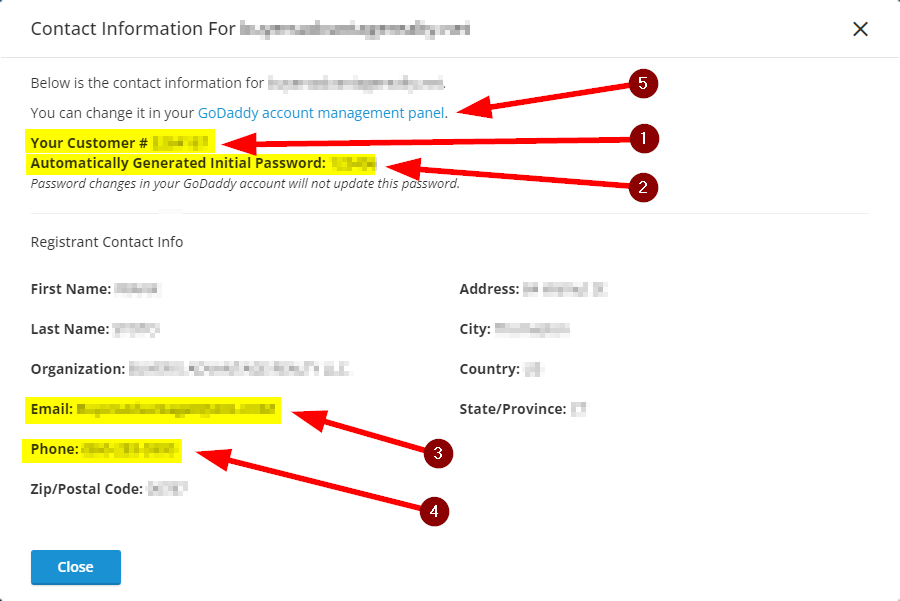
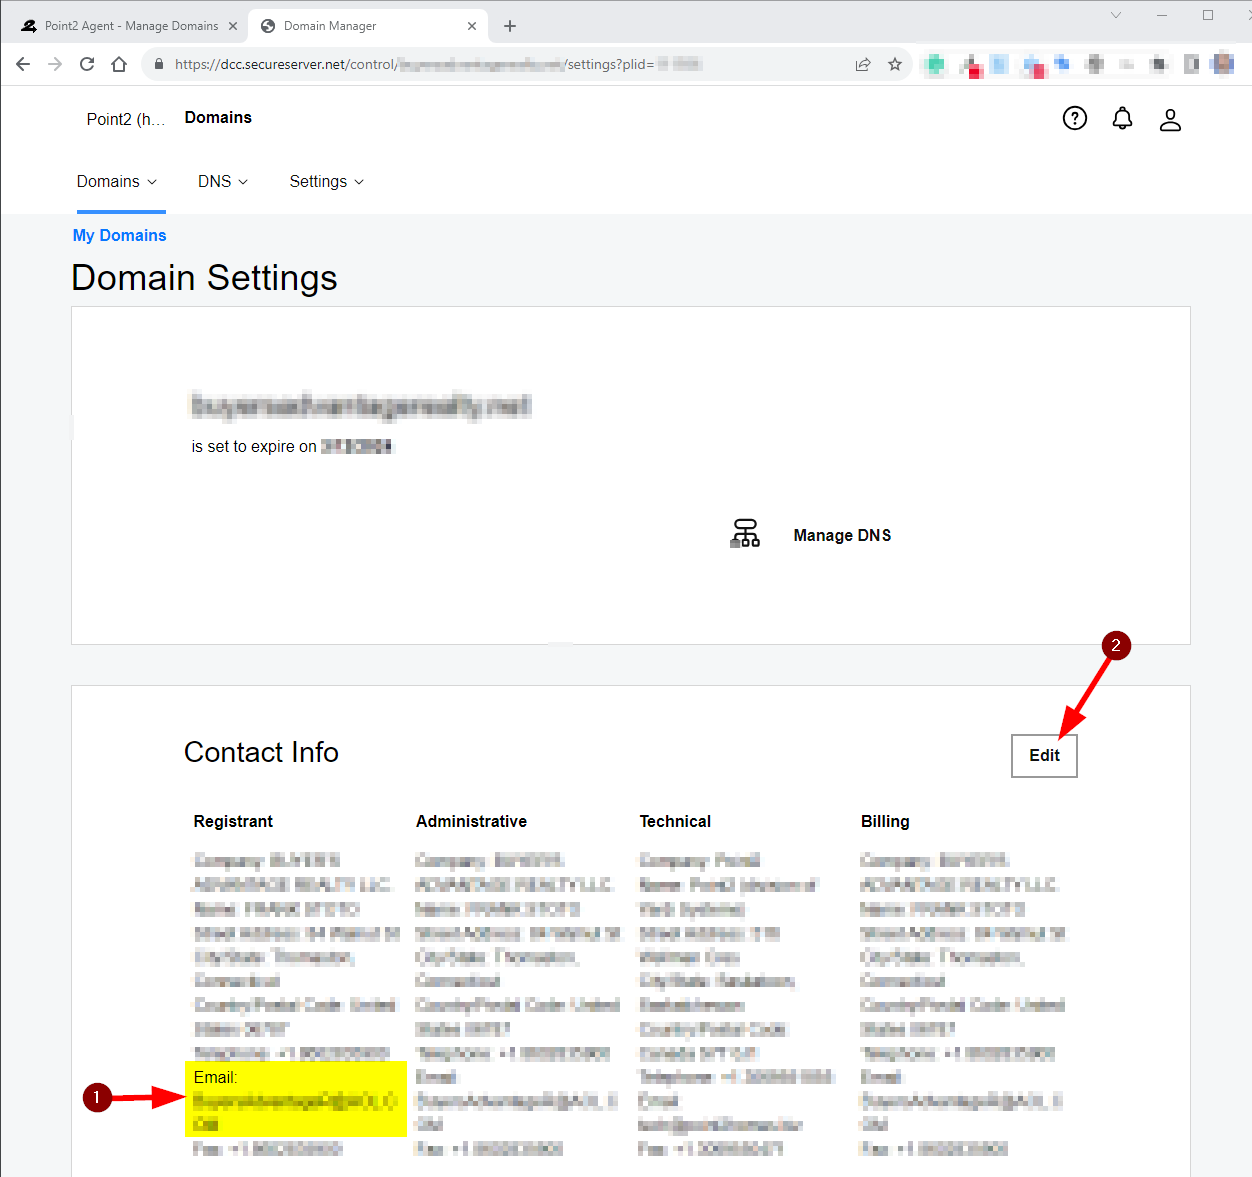
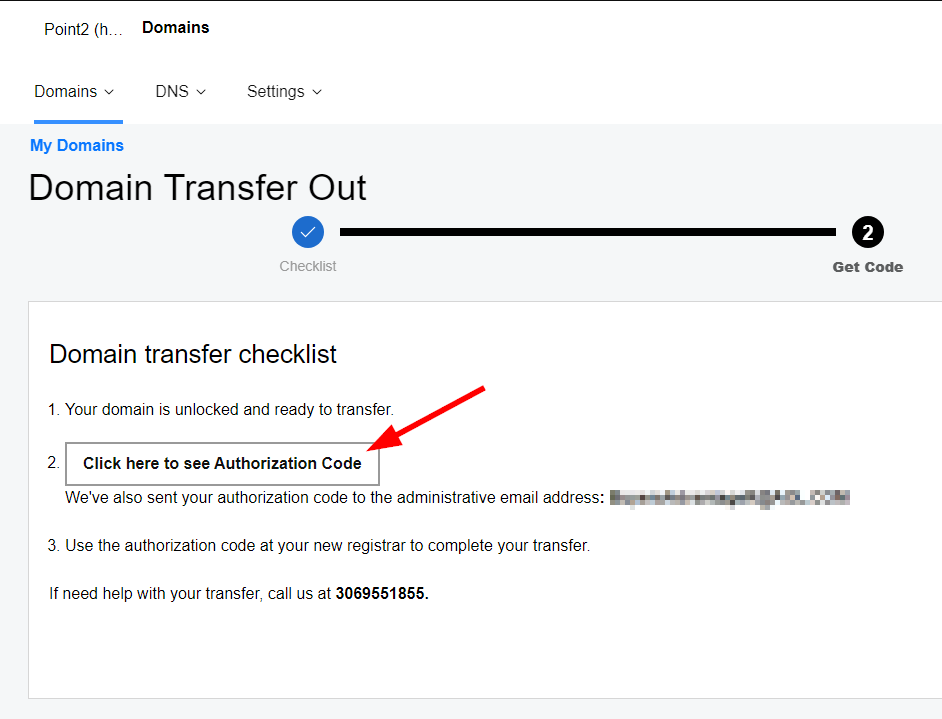
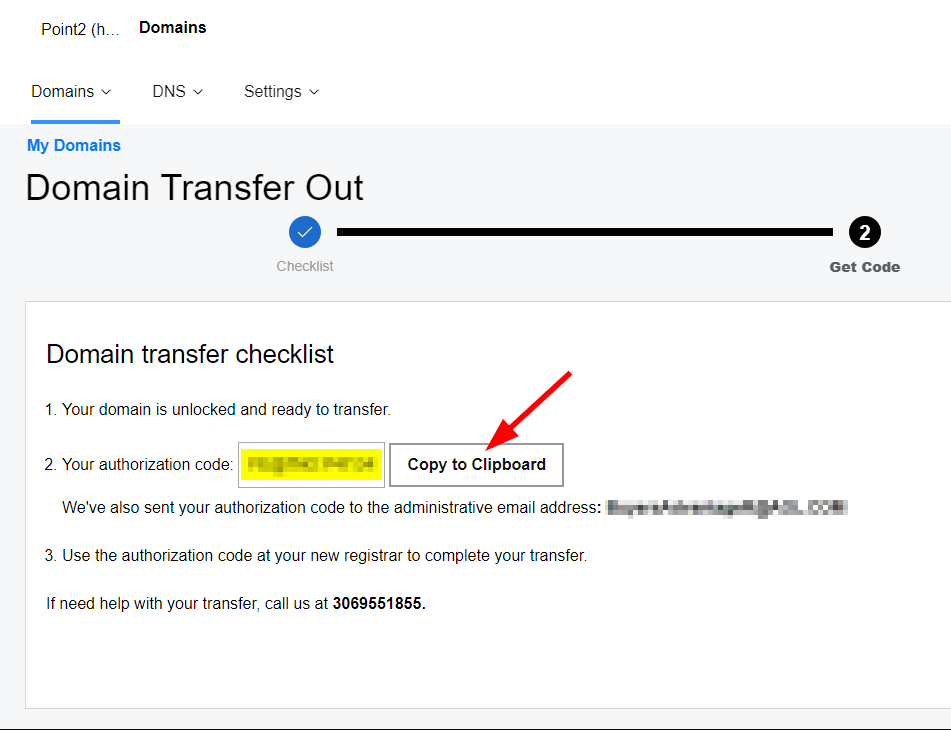
. We will use the code to start the domain transfer.
  25. Once we have notified you that the transfer has been started, click View details on the My Domains page.
  26. Details will be displayed.
    1. Click Transfers Out.
    2. Check the box next to the domain.
    3. Click Approve Transfer.
  27. The domain has been successfully transferred. The page below will be displayed. Note that no transfers are listed.


Need Help With This? Contact Us!


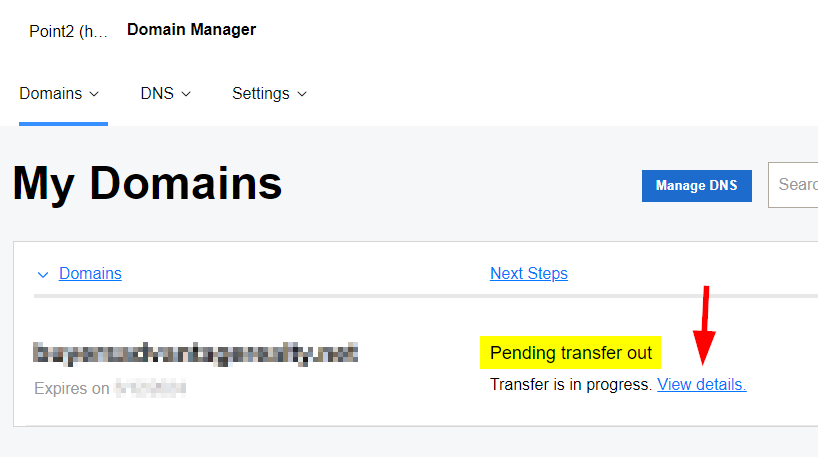
20+ YEARS OF QUALITY SERVICE WITH A SMILE

@ 2024 AgentWebsite  Terms of Use | Privacy